Yoga Postures Specifically Beneficial to Equestrians
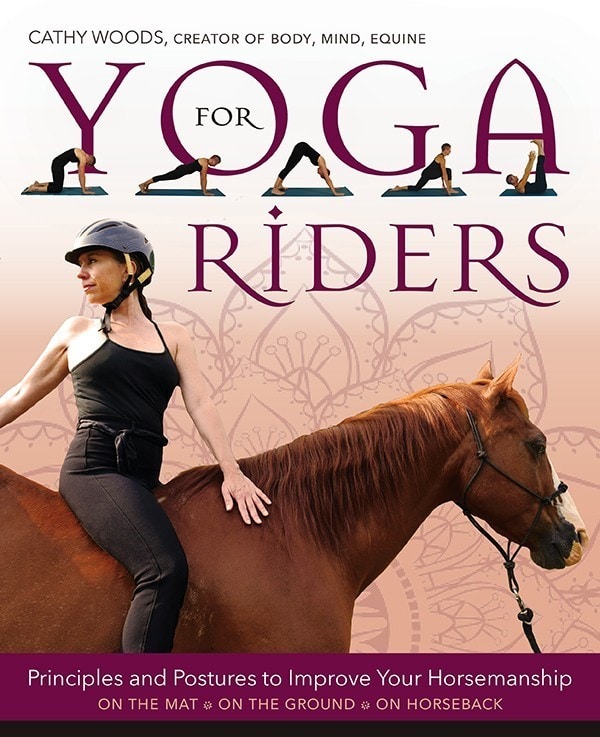
—EXTRACT FROM: Yoga for Riders: Principles and Posture to Improve Your Horsemanship by Cathy Woods
Improved balance and focus; better reaction time; increased range of motion; more strength; greater flexibility; fewer injuries; boosted immune system? Yes, please! Yoga postures can help with all these—and more.
In this chapter you’ll find ways to use the yoga mat for personal “groundwork” in the form of yoga. Through the use of postures, you can more fully experience and fine-tune your body, thus creating better overall health and increased awareness, on and off the mat.
All yoga postures have value, whether you ride horses or not. However, some have more benefits for equestrians.
The word asana in yoga means posture, position or pose and is one of the eight limbs of yoga. It is the one that most people are familiar with and often associate with yoga. The term asana is applied to any type of yoga position, whether seated, reclining, standing, inverted, twisting, or balancing. For example, in a traditional yoga class setting, you may hear words like tadasana, which means Mountain Pose, or vriksasana, meaning Tree Pose. Each posture name incorporates the word asana. However, in my book I use the common names only for each posture for easier understanding.
There are uncountable numbers of yoga postures, along with variations on many of them. For my book I have chosen a selection of postures that I feel work and represent each body area. Being a horseback rider and talking with many equestrians, I chose postures that I feel are helpful to the muscles that riders use most: areas that usually feel tighter, or that cause riders issues or discomfort. These are basic, but very effective and beneficial postures. If you are new to yoga, it might be best to learn the basics, which you may actually find to be enough. However, should you feel inclined to expand your knowledge, there are many online sources, and better yet, many good instructors out there. There is no end game to doing yoga—I have been doing these and other postures for 30-plus years and never tire of them. Each time, and especially as I age, I find that I encounter my body in a new way, greeting it with what’s present that day.
On the Mat
WARRIOR II
Strengthens legs, specifically the quadriceps (thigh muscles), and increases balance and focus. It’s important to keep your bent knee aligned over your ankle, not over your toes. This position supports and protects the knee joint. (If you have knee issues or feel pain during this pose you may want to omit this posture.)
How to Do Warrior II
7.33 A-D Warrior II:
Begin the Warrior II pose with your legs wide on the mat (A), then raise your arms even with your shoulders and turn one foot to the side (B). Turn and look the same direction as the foot is pointing (C). Finally, move into a lunge position with your forward knee (D). photo credits: Carol Engan Borelli
1) Stand with feet wide. Turn one foot out to the side, and bring your arms into a T-position at shoulder height with your palms facing downward. Be sure both arms are even.
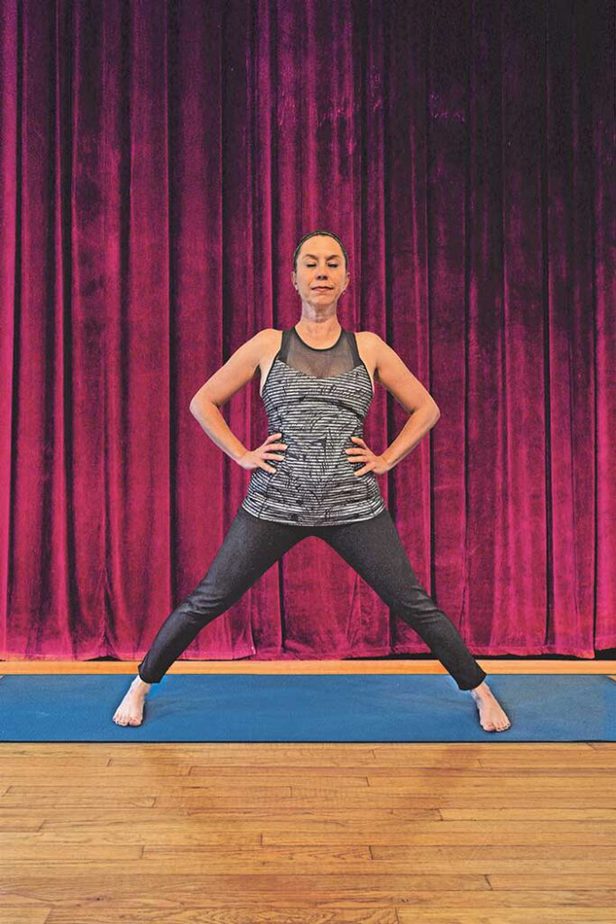
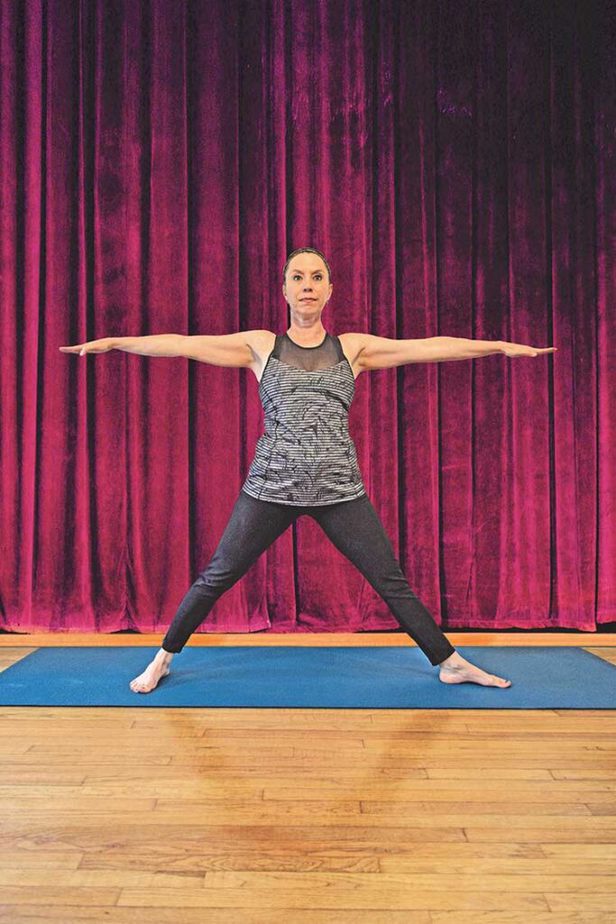
2) Bend the knee on the same side as the foot that’s turned out, going into a lunge position (figs. 7.33 A–D). As you lunge forward, keep your shoulders over your hips (you are not moving your upper body), glancing down to be sure the knee is in the correct position. The depth of your lunge depends on your body type and flexibility.
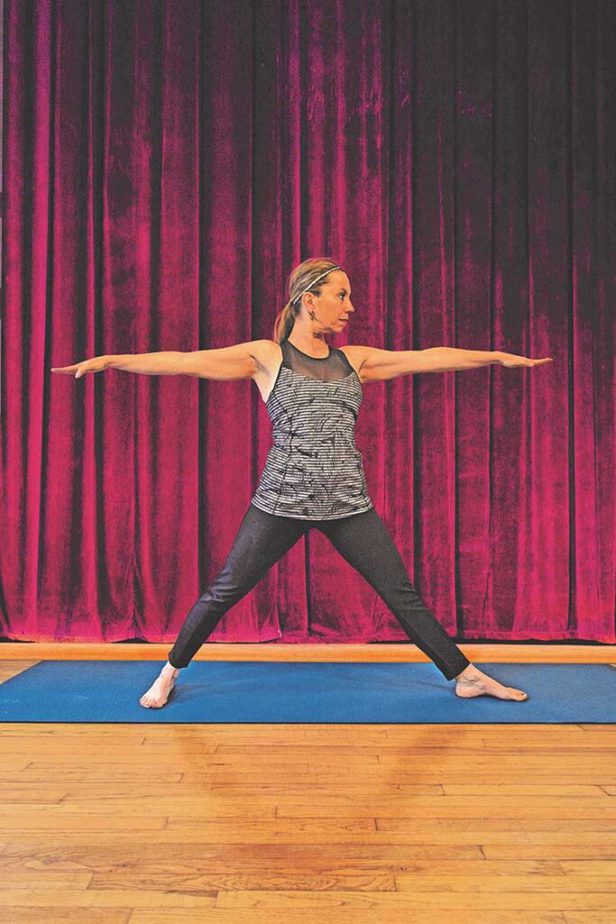
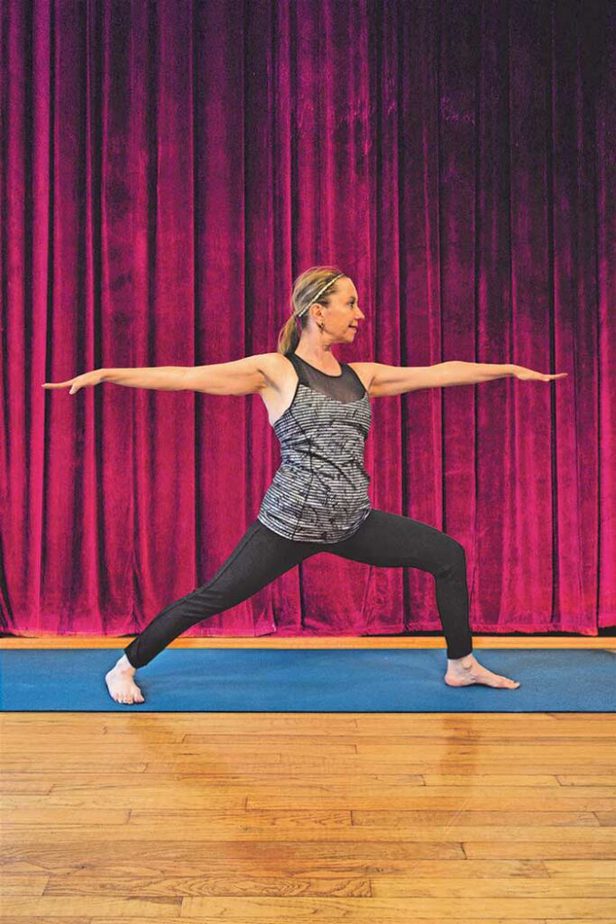
3) Fix your gaze out over your fingertips. Deep breathing is essential in Warrior to take in oxygen; it gives you energy to hold the pose longer. See if you can hold the position for about five breaths—you may be able to work up to longer as you get stronger.
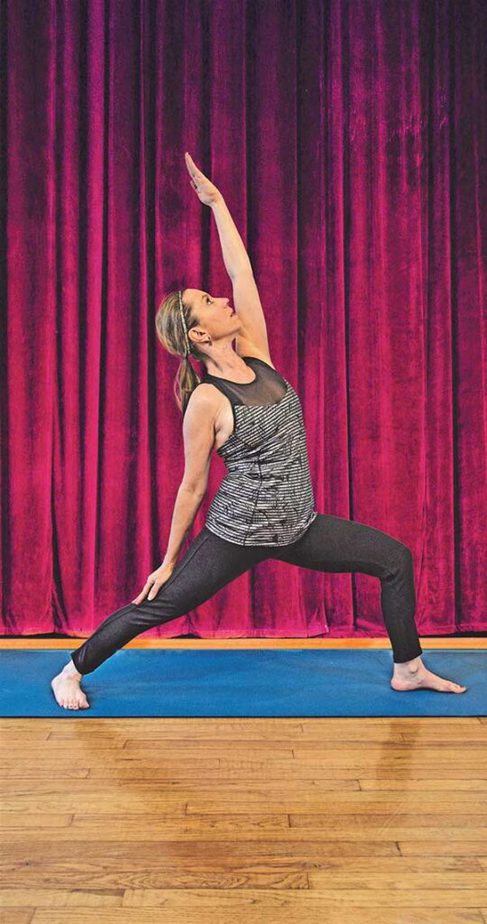
4) Other versions of this pose include Warrior I, Warrior III, and Reverse Warrior (fig. 7.35.)
7.35 Warrior II Variation:
On Horseback
WARRIOR ARMS
These arm positions help with body alignment and awareness, balance, finding and moving from your physical center, learning to move from your core and working arm and upper back muscles.
How to Do T Pose into Warrior Arms
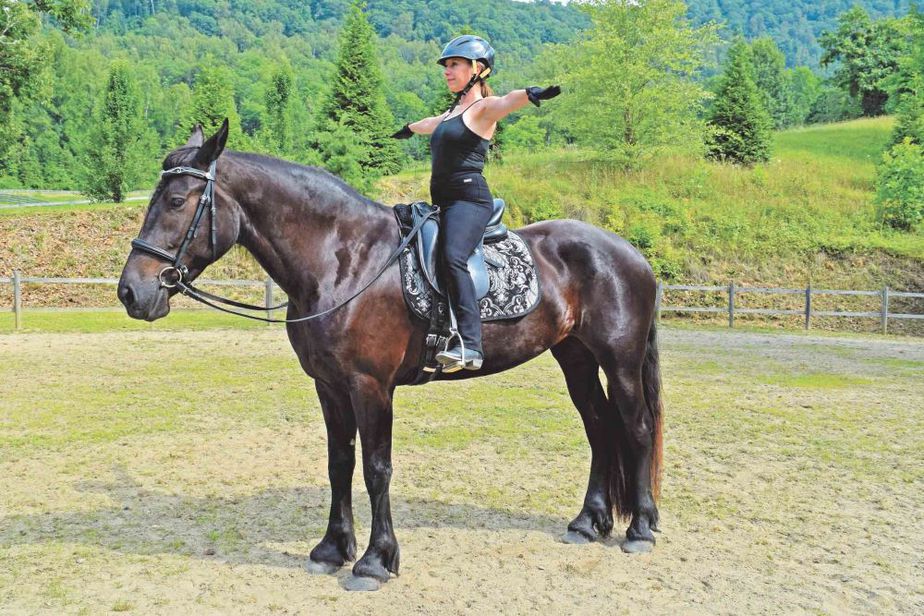
On the yoga mat, Warrior Pose is done while standing; when on horseback, we only do the arm portion of the posture from a seated position. This helps with rider alignment and learning where your body is in space and time.
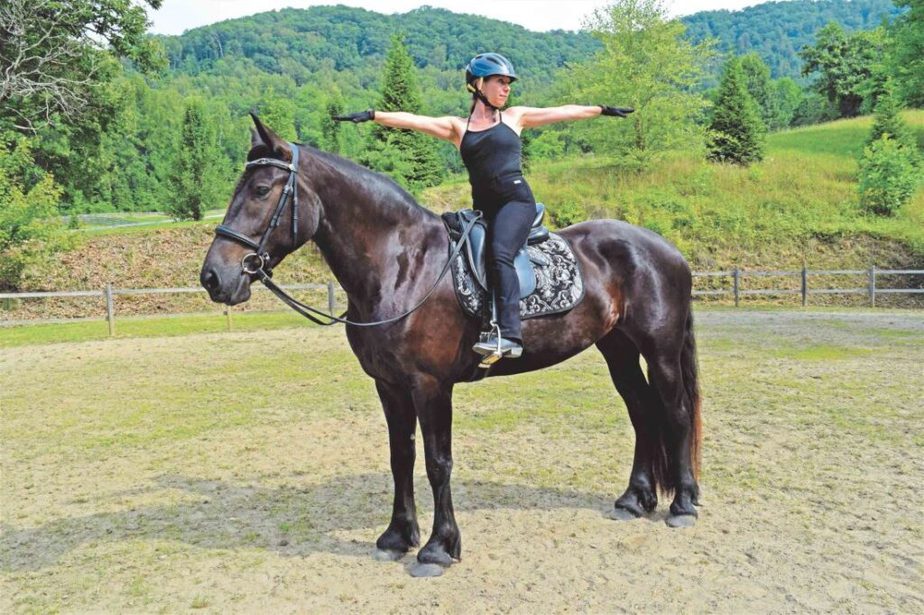
While sitting on your horse and looking straight ahead, inhale your arms to a T position. Take a look (or have a friend look) and confirm both arms are at shoulder height, with palms facing downward. You can remain here while taking a few full breaths, feeling the muscles that are working to hold you in place. Incorporate a twist to further the stretch and gaze out over your back hand’s outstretched fingertips (figs. 8.8 A & B). Continue to keep the arms at shoulder height while in the twist.
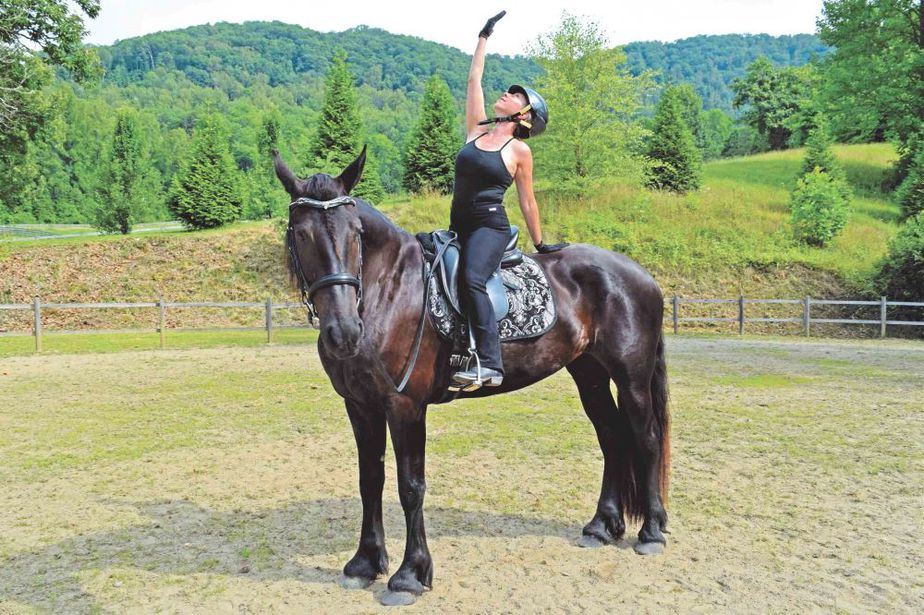
If you’d like to go yet another step further, bring your arms into Reverse Warrior position, opening the heart toward the sky and stretching the back and the front of your body. To do this, turn your front palm in the direction of your face and raise that arm above you. Gaze upward toward your fingertips, placing your back hand on your horse’s rump for support and to help you lean deeper into the posture, enhancing the stretch. Breathe a few slow, full breaths, then repeat the positions on the other side.
8.8 A–C T Pose into Warrior Arms:
Begin looking straight ahead as you raise your arms into a T (A). Then twist at the waist in one direction, rotating your head until you are looking over the outstretched fingers of your back hand (B). Reverse Warrior on horseback opens and stretches the front and back of the body (C). (Photo credits: Carol Engan Borelli)
This excerpt from Yoga for Riders: Principles and Posture to Improve Your Horsemanship by Cathy Woods and published by Trafalgar Square Books / HorseandRiderBooks.com was reprinted with permission from Trafalgar Square Books.
Interested in more equestrian yoga? Visit our Rider Wellness page for much more.









SOCIAL